Hiding API Keys on React Native in 10 Minutes with AWS API Gatweway
The popular react-native-google-places-autocomplete library asks you to paste your third-party API keys in frontend code, which is pretty insecure. But you can stay secure without wasting a whole day on a custom workaround. Here’s how.
Sections
- Introduction
- Simple Proxy on API Gateway (web console)
- Simple Proxy on API Gateway (command line)
- Testing Your Proxy
- Adding Proxy URL to Frontend
Introduction
At work, I’m using Farid Safi’s excellent library react-native-google-places-autocomplete to provide a UI for results from the Google Places API. It’s clean, easy-to-use, and a joy to work with.
Just one issue.
The library wants your API key so it can make requests to Google on your behalf… but React Native’s own documentation discourages this practice.
Never store sensitive API keys in your app code. Anything included in your code could be accessed in plain text by inspecting the app bundle.
…
If you must have an API key or a secret to access some resource from your app, the most secure way to handle this would be to build an orchestration layer between your app and the resource.
That sounds pretty daunting. An orchestration layer? Who has time for that?!
There is a workaround though, and you can set it up in minutes.
All you gotta do is set up a proxy in AWS API Gateway between your app and the API. This proxy can then inject your API keys into any request you send it and then forward that request on to the Google Places API.
Here’s how to set it up, in two different ways: through the AWS web console, and through the command line.
Simple Proxy on API Gateway (web console)
- Visit the API Gateway section of the AWS web console
- Click Create API
- Click Build underneath the REST API option (not the HTTP API option)
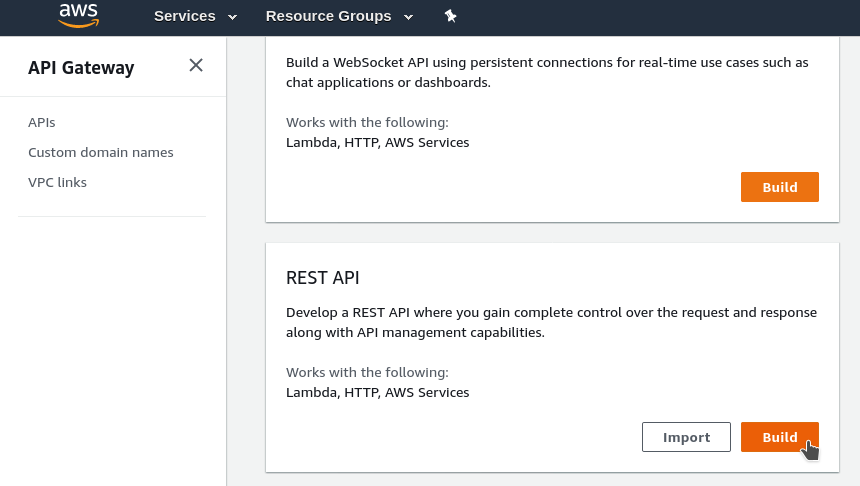
Build REST API button in AWS API Gateway console - Add the name of your API and click Create API. Use the settings shown below
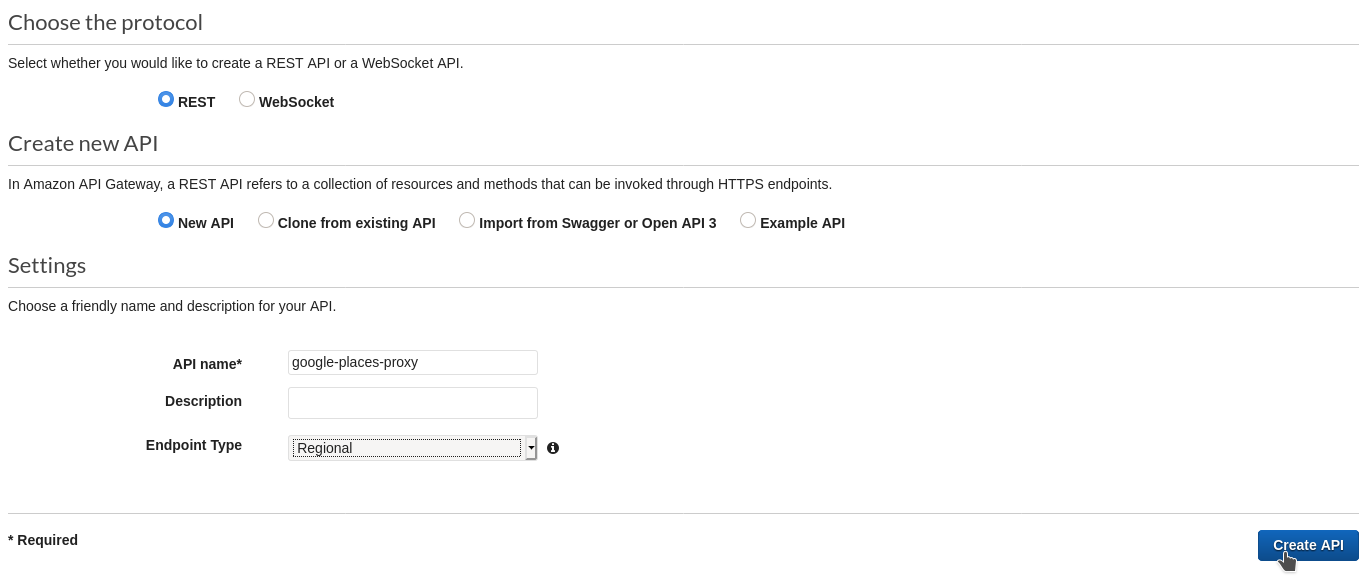
Create API default options with name google-places-proxy - Now, you should see a dropdown in the middle of the screen titled Actions. Click that and then select Create Resource
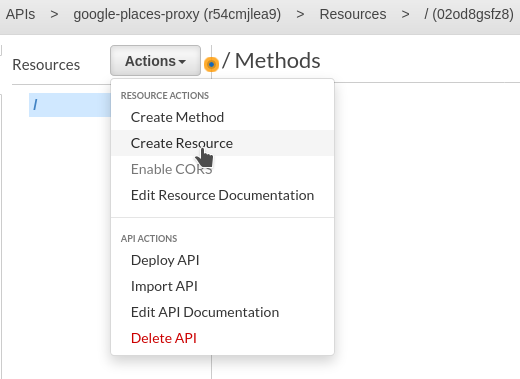
Option ‘Create Resource’ in the dropdown menu titled ‘Actions’ - In the newly opened New Child Resource tab, check the box titled Configure as proxy resource and then click Create Resource
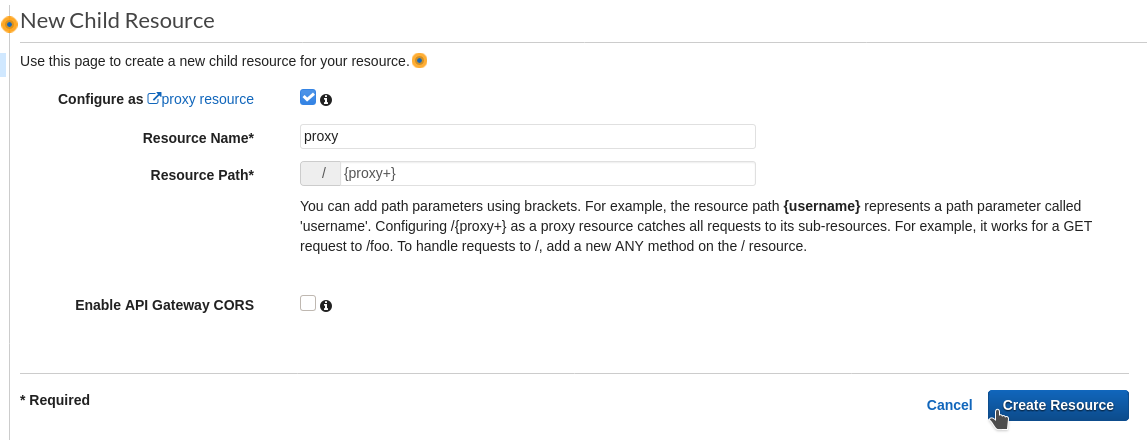
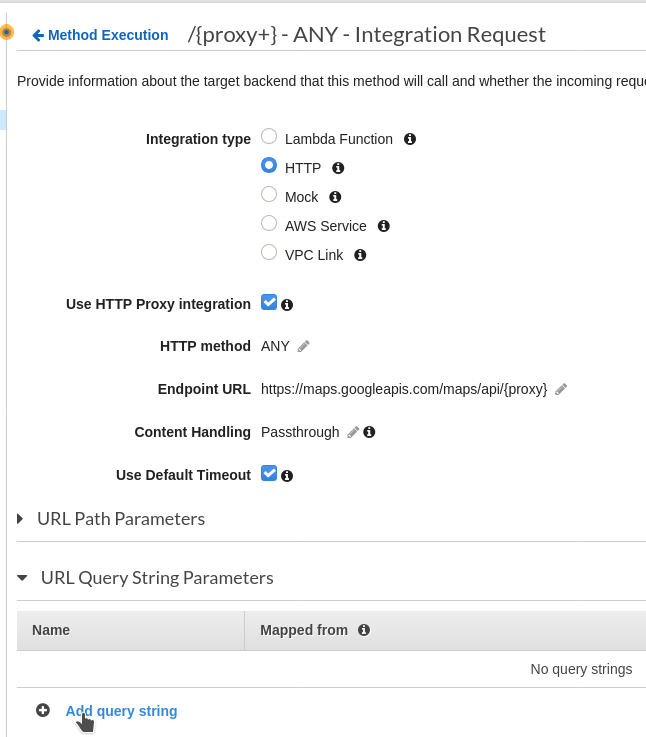
‘New Child Resource’ tab with ‘Configure as proxy resource’ selected - In the newly opened /{proxy+} - ANY - Setup tab, select the HTTP Proxy option, enter the Google Places API root URL with
{proxy}at the end (https://maps.googleapis.com/maps/api/{proxy}) into the Endpoint URL text box, and then click Save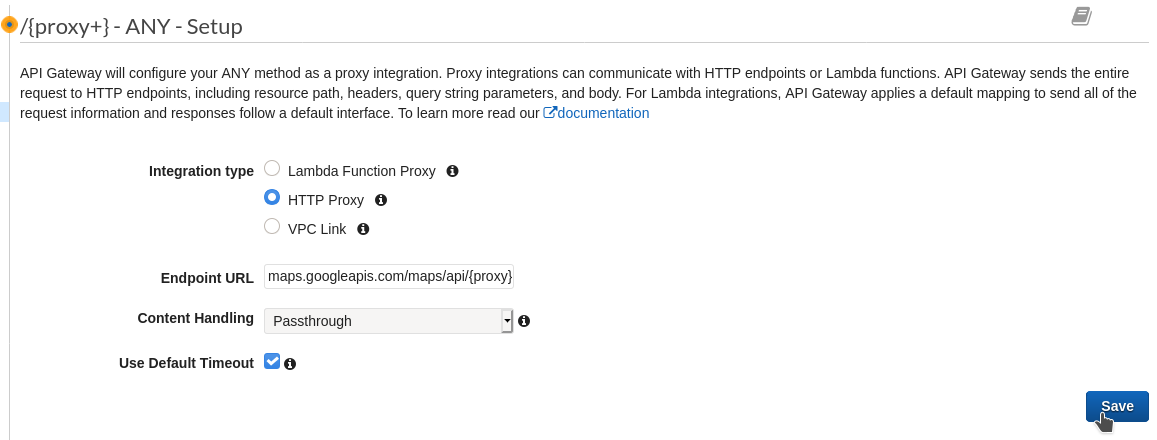
‘Setup’ tab with ‘HTTP Proxy’ option selected and Google Places API URL as the endpoint URL - In the newly opened Method Execution tab, click on Method Request
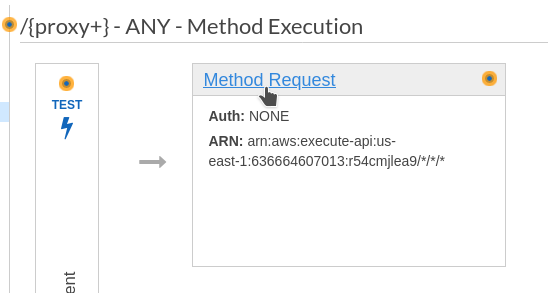
mouse hover over ‘Method Request’ link - Click Add query string under the URL Query String Parameters section of the Method Request tab
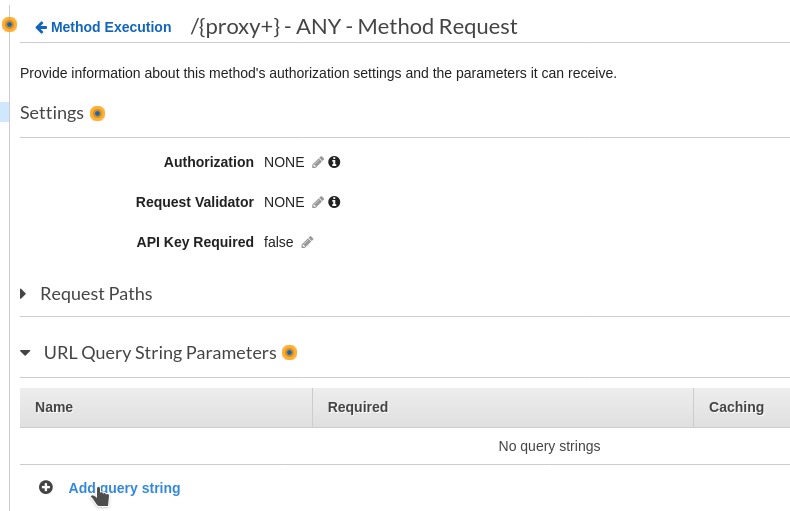
mouse hover over ‘Add query strng’ link - Add a query string parameter titled
key. Save by clicking on the checkmark at the right of the screen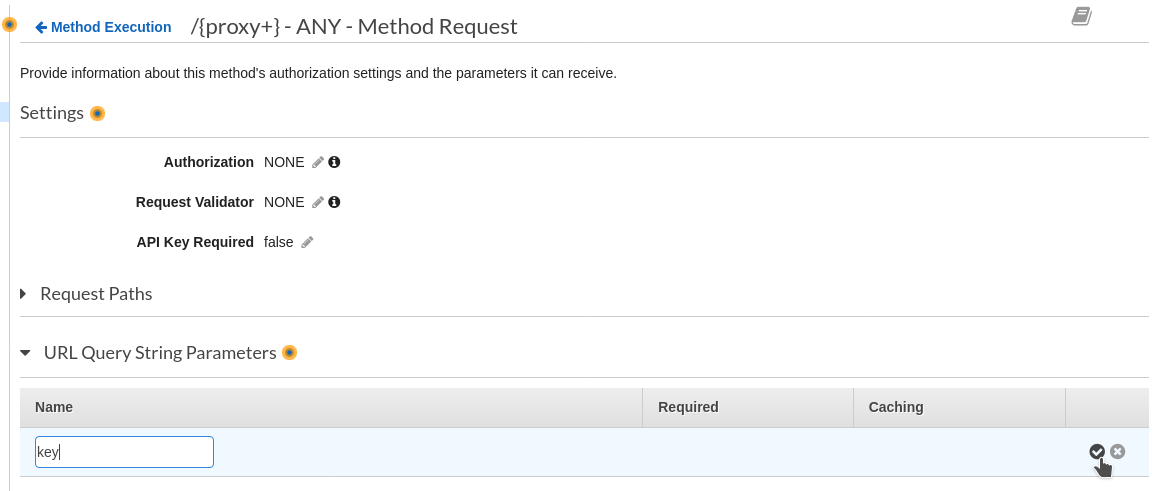
saving the query string parameter ‘key’ - Go back one page by clicking Method Execution at the top left
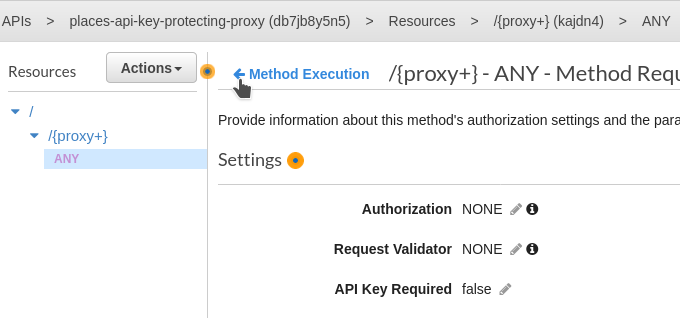
mouse hover over ‘Method Execution’ link - In the Method Execution tab, click on Integration Request
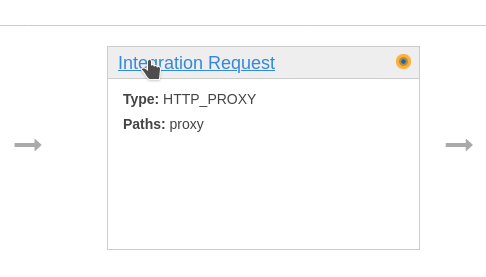
mouse hover over ‘Integration Request’ link - Click Add query string under the URL Query String Parameters section of the Integration Request tab
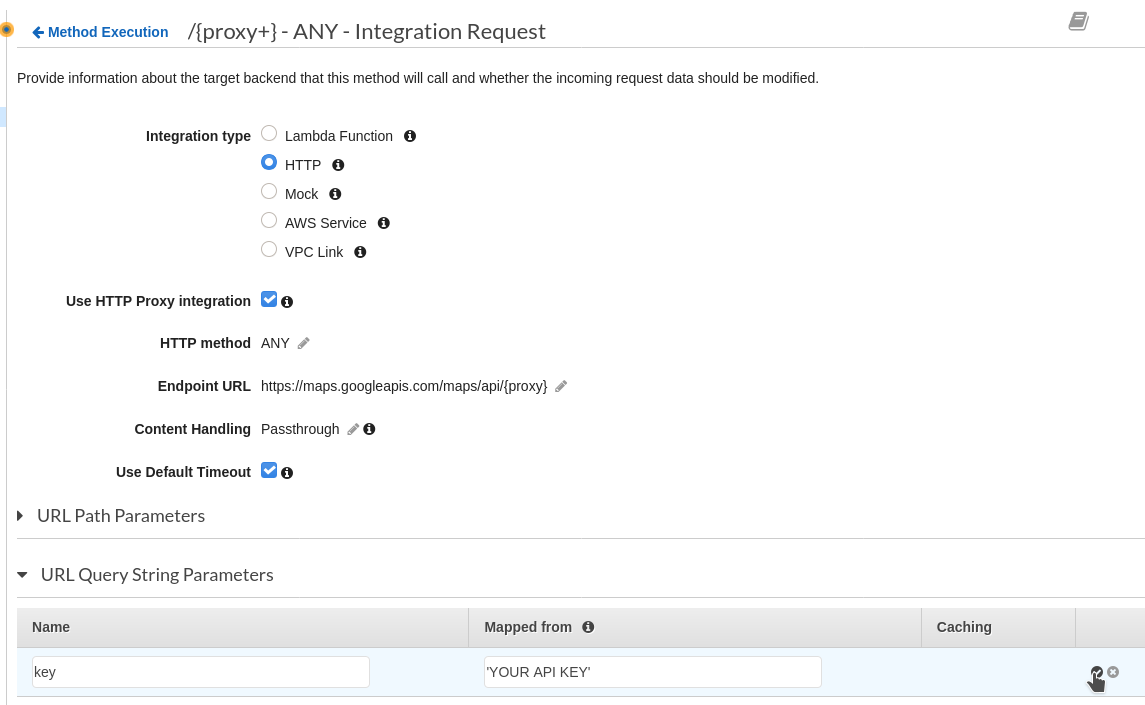
mouse hover over ‘Add query string’ link - Add a query string parameter with “Name” set to
keyand “Mapped From” set to'YOUR API KEY'. Save by clicking on the checkmark at the right of the screen.

Simple Proxy on API Gateway (command line)
I’ve created
a terraform module that simplifies the whole process of setting up and provisioning your proxy.
We’ll use it here.
Using terraform, you can follow these steps to set up your proxy.
-
Create the following file (replace ALL_CAPS variables with their respective values)
main.tfprovider "aws" { region = "us-east-1" } module "key_forwarding_api_proxy" { source = "kathawala/key-forwarding-api-proxy/aws" version = "1.0.0" name = "PROXY_NAME" tags = { tag1 = "A" tag2 = "B" } url = "THIRD_PARTY_API_URL" query_param_key = "QUERY_PARAM" query_param_value = "API_KEY" } output "proxy_url" { value = module.key_forwarding_api_proxy.url }EXAMPLE: If we were trying to forward requests on to the URL
https://maps.googleapis.com/maps/api/and we wanted to insert the query parameter?key=d7sdauhuf3ewfwejinto each request, ourmoduleblock might look as followsmodule "key_forwarding_api_proxy" { source = "kathawala/key-forwarding-api-proxy/aws" version = "1.0.0" name = "google-places-api-proxy" tags = { env = "staging" api = "Google Places API" } url = "https://maps.googleapis.com/maps/api" query_param_key = "key" query_param_value = "d7sdauhuf3ewfwej" } -
Run
terraform init -
Run
terraform plan -
Run
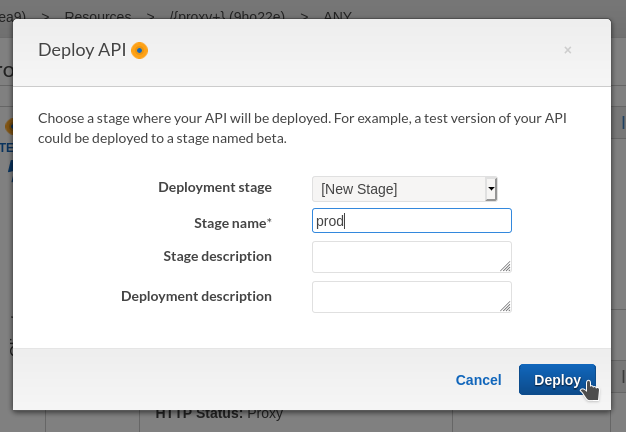
terraform apply
Testing Your Proxy
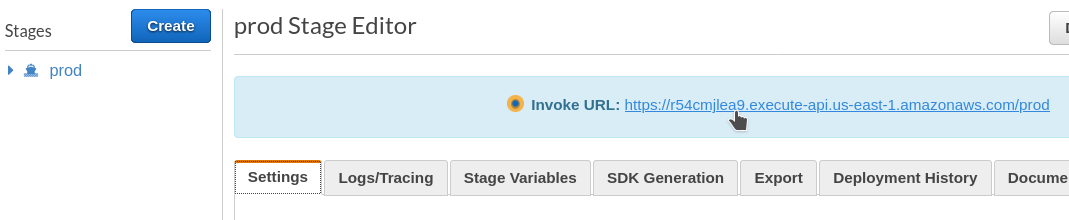
That’s it! Now your proxy is all set up to forward your requests along to your third-party API. You can test it out with a request to your API. For example, see if you can run the following command in your terminal and get the same output.
https://r54cmjlea9.execute-api.us-east-1.amazonaws.com/prod/) is the output value of proxy_url from when you ran terraform apply
$ curl "https://r54cmjlea9.execute-api.us-east-1.amazonaws.com/prod/place/search/json?location=33.618389,72.972779&radius=300&types=post_office&sensor=true"
{
   "html_attributions" : [],
   "results" : [
      {
         "business_status" : "OPERATIONAL",
         "geometry" : {
            "location" : {
               "lat" : 33.61868949999999,
               "lng" : 72.9731161
            },
            "viewport" : {
               "northeast" : {
                  "lat" : 33.62010743029149,
                  "lng" : 72.97441303029152
               },
               "southwest" : {
                  "lat" : 33.61740946970849,
                  "lng" : 72.97171506970849
               }
            }
         },
         "icon" : "https://maps.gstatic.com/mapfiles/place_api/icons/post_office-71.png",
         "id" : "ec1a7a0875e550cdb4fe4ab54bfae4051e02f8ac",
         "name" : "Pakistan Post",
         "opening_hours" : {
            "open_now" : false
         },
         "photos" : [
            {
               "height" : 4160,
               "html_attributions" : [
                  "\u003ca href=\"https://maps.google.com/maps/contrib/103011710570639270239\"\u003eSadaf Butt\u003c/a\u003e"
               ],
               "photo_reference" : "CmRaAAAAjZeh9iMZ2d-NedtXCUgUW8Z5l0Bnl5m7cT65_wqG_-nuhP1RvdODnZ7v-v6JqdQlO7UfaGKCj5TGRZwjfrlnVqcKVLAQz62JQs7N1G-zNYx4ZO4hRolhgUfGN6REmsG1EhAqb
lSYiJdYmobBzmvhWpjAGhTewfPEdjfOOMDeozGt5G7JWjqHKw",
               "width" : 3120
            }
         ],
         "place_id" : "ChIJJSmceIyW3zgRt7kx0N0FrqE",
         "plus_code" : {
            "compound_code" : "JX9F+F6 Islamabad, Pakistan",
            "global_code" : "8J5JJX9F+F6"
         },
         "rating" : 4.5,
         "reference" : "ChIJJSmceIyW3zgRt7kx0N0FrqE",
         "scope" : "GOOGLE",
         "types" : [ "post_office", "finance", "point_of_interest", "establishment" ],
         "user_ratings_total" : 4,
         "vicinity" : "Street 50, Islamabad"
      }
   ],
   "status" : "OK"
}
You’ve just sent a request to the Google Places API, without specifying your API key. Congrats!
Adding Proxy URL to Frontend
Now you just need to replace the base URL of your frontend calls to the third-party API with the Invoke URL (if you used command line, proxy_url) value from before.
With the library I’m using (
react-native-google-places-autocomplete), there’s a little bit more code that needs to be changed.
Before adding the proxy URL in, if you’re using the library I am, your frontend code will look something like the following:
googleplacesinput.jsx
import React from 'react';
import { Image, Text } from 'react-native';
import { GooglePlacesAutocomplete } from 'react-native-google-places-autocomplete';

const GooglePlacesInput = () => {
  return (
    <GooglePlacesAutocomplete
      placeholder='Search'
      onPress={(data, details = null) => {
        // details is provided when fetchDetails = true
        console.log(data, details);
      }}
      query={{
        key: 'YOUR API KEY',
        language: 'en',
      }}
    />
  );
};

export default GooglePlacesInput;
You want to be able to make this work without specifying the key prop.
Fortunately, this library has a requestUrl prop which lets you specify a proxy URL instead of the original domain https://maps.googleapis.com/maps/api.
You can use this prop and remove your API key from this component by changing this code:
return (
  <GooglePlacesAutocomplete
    ...
    query={{
      key: 'YOUR API KEY',
      language: 'en',
    }}
  />
);
to this code:
return (
  <GooglePlacesAutocomplete
    ...
    requestUrl={{
      url: 'YOUR PROXY URL',
      useOnPlatform: 'all'
    }}
    query={{
      key: undefined,
      language: 'en',
    }}
  />
);
Simply replace YOUR PROXY URL with the value from Invoke URL (or proxy_url if you used CLI) from the proxy you created in API Gateway.
Farhan Kathawala
Full Stack Web / React Native Developer
A happy full stack developer sharing tidbits of everything and anything web / mobile app dev.